Configuring BIOS Settings for GPU Mining on Intel Motherboards
One of the more difficult things for people not used to building PC’s to do is configuring the BIOS settings so the mining rigs run stable. This is important to do, but the first time the PC boots and the BIOS screen pops up, it can be a little intimidating. Last week I took pictures of the specific settings changes I made on a Biostar TB85 motherboard. I have also done similar setup on MSI and Asrock motherboards, and although the screens are different, the basic concept is the same.
First off, it’s hard to break the machine making these settings. Worst case, you can always reset them back to factory default by moving a jumper on the motherboard to erase the BIOS memory.
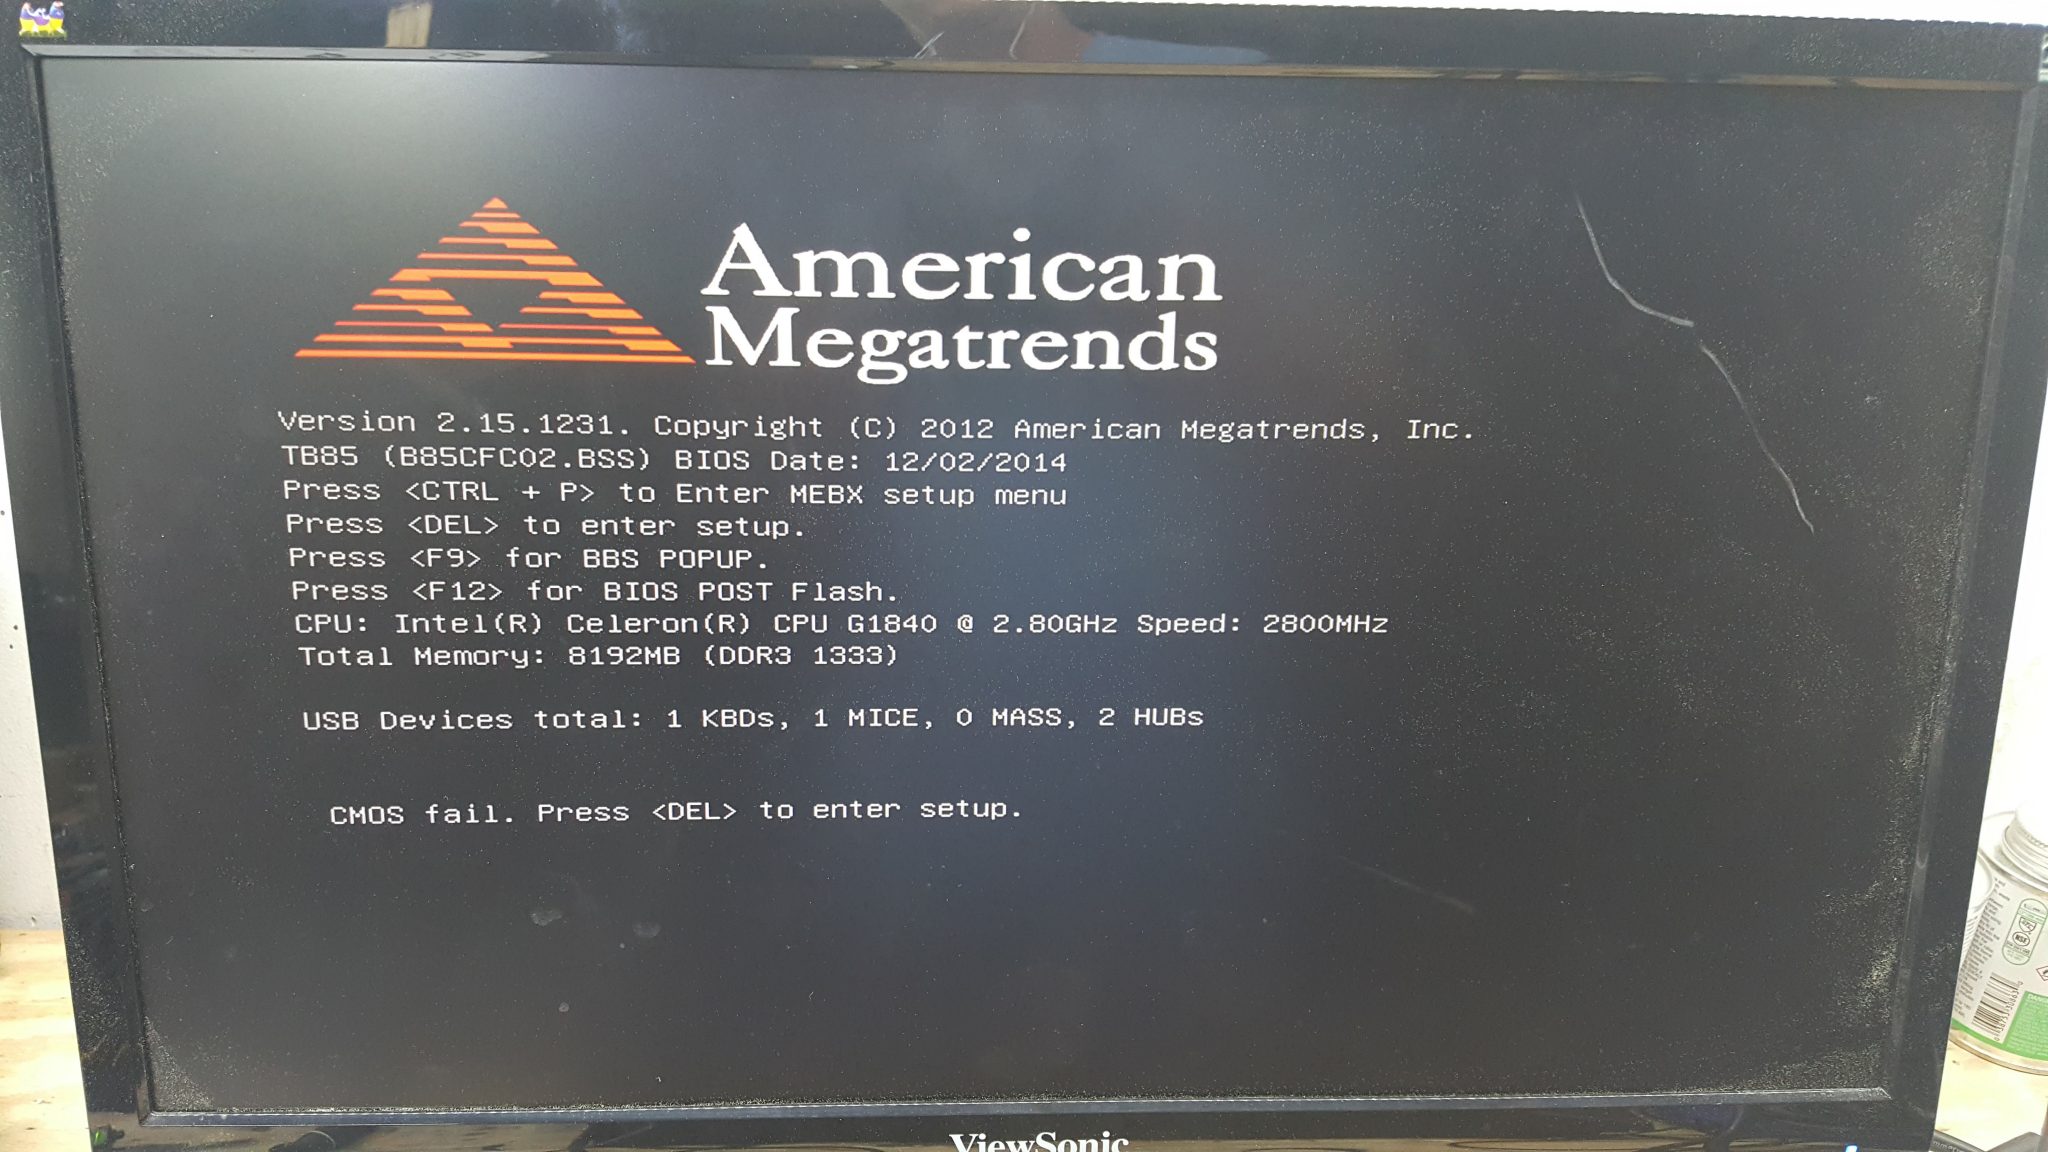
This is the screen you will see if you boot the PC without a SSD with an operating system on it. For most systems, if you need to make changes, you can hit the Del key on the keyboard repeatedly after turning on the power, and it will go to the BIOS setup. On others, it is the F2 or F12 key. Sometime I hit all three keys repeatedly just to get to the BIOS settings screen.
After hitting Del, you get to the main BIOS settings screen:
Although you can connect a mouse to the PC, it’s faster to not use the mouse and just navigate with arrow keys, Enter, and Esc key. From this screen, hit the right arrow key, which takes you to:
On these types of screen, I typically use the down arrow, then Enter, to look at the options under each section. Sometimes the option I want is deeper into the screen. In this case, hit Enter for the PCI settings, taking you to this screen:
I like to change the PCI Latency timer to 96 PCI Bus clocks. It works better that way. After making this selection, hit Esc to get back to the previous screen, then down arrow and Enter to go to the next option:
On this page I turned off Hibernation. Don’t know if that’s necessary, but I don’t want my GPU miner Hibernating. Then it Esc, down arrow, and Enter again:
Disable the Inter Virtualization Technology. We are not going to be running any VMware or Virtualbox applications on this mining system. Then hit Esc, down arrow, and enter again:
Next (picture above here) make it so the PC reboots when the power is cycled. I usually choose Last State, but many people choose Power on. If you choose power on, you won’t need a power button connected to the motherboard, because as soon as the power button on the power supply comes on, the PC will boot.
Go back to this page by hitting Esc:
Then use the right arrow to go to this page below:
Next, hit enter, to change some of the PCI settings:
Disable the Sound system. We don’t need sound for mining. Then hit Esc, down arrow, and enter, taking you to this screen:
Turn off the internal graphics. We don’t need it, and it just uses up PCI lanes we need for external GPU’s. Then hit Esc, and right arrow two or three times to go to the next major screen:
From this page, save the changes. That’s all you need to do to make your miner run stable. The system will reboot, and you can go on to the rest of your build.


GPU Mining Zcash and Ethereum with EthosDistro and AMD RX470 - Block Operations
April 9, 2017 @ 12:18 am
[…] Seems kind of cryptic unless you have been messing around with PC’s for a while. I took some pictures this time as I changed the BIOS settings, and put these in a separate post called BIOS Settings for GPU Miners on Intel Motherboards. […]
April 15, 2017 @ 6:59 am
Do you run into issues with the TB85 losing its BIOS settings on a GPU fault? I’ve had stability issues with my 6 GPU rig (6 x R9 Fury) and every time it hard faulted/froze, the BIOS settings reset back to stock. It was really annoying to troubleshoot for about a half a day when I was getting inconsistent results. Once I figured out that the BIOS settings were reverting, I was able to better control the actual results, though I suffered through trial and error.
Have you been able to figure out how to undervolt your GPUs on Linux? Most people say to flash custom firmware with the voltages tuned way down, but that seems like a lot of work to plug each individual GPU into a Windows machine, modify/flash, and then put back in the miner. In the long run it might be worth it, but someone has to have figure out an easier way to configure a miner to undervolt in Linux.
I noticed in your other post that ethOS has the ability to do it, I might just bite the bullet and switch, probably way less hassle.
Thanks man for the guides, great work and explanations.
June 17, 2022 @ 4:07 am
Hey mine keeps resetting what should I do to fix this. Thanks
July 14, 2017 @ 6:28 pm
Veru helpfull…
April 14, 2021 @ 4:47 am
What about 4G decoding?