Build a ZenCash Secure Node Part 2.5 – Test TLS and SecNodeTracker
Do Not Use This Guide!
THIS GUIDE IS NO LONGER ACCURATE!
Instead, please use the ZenCash guide at zencash.com
https://documentation.zencash.com/display/ZEN/Installation
I am keeping this post up for historical information and to help people who want to continue to use this guide.
NOTE! If you are setting up a new ZenCash Secure Node – look at this guide first: https://blockoperations.com/how-to-build-and-operate-a-zencash-secure-node/
————————————————————————————————————————————-
Secure Nodes from ZenCash are getting close to beta testing. Many people have asked for a guide to join the testing.
Here is a quick guide to getting the system running on testnet with the node software using TLS, and running the tracker.
If you have followed along the previous guide, this should work for you. Please note I recently (Sept 18) changed how certificates are created and renewed to make it much simpler to set up.
If you set up your TLS certification setup using Certbot on an older version of my previous guide please go back and redo it using the much simpler and more secure acme.sh implementation for Letsencrypt certs!
Previous guide is here: http://blockoperations.com/build-zencash-secure-node-part-2-build-zen-node/
First get the new version of Zen node software with TLS support directly from github:
Compile the master branch:
cd ~/zencash/zen
git fetch
git checkout master
git pull
./zcutil/build.sh -j$(nproc)
While this is compiling, in a second screen update the zen.conf file with certificate and testnet info. Look back at where your certs are kept, and use those file locations. Edit ~/.zen/zen.conf and add 2 lines at bottom. Modify as necessary for your server, of course:
vim ~/.zen/zen.conf
tlscertpath=/home/blockops/.acme.sh/znode.blockoperations.io/znode.blockoperations.io.cer
tlskeypath=/home/blockops/.acme.sh/znode.blockoperations.io/znode.blockoperations.io.key
Now we need to add the intermediate certificate path to the trusted root store (hat tip @psyrax). Do this:
sudo mkdir /usr/share/ca-certificates/letsencrypt/
sudo cp /home/blockops/.acme.sh/znode.blockoperations.io/ca.cer /usr/share/ca-certificates/letsencrypt/ca.crt
sudo dpkg-reconfigure ca-certificates
This last statement runs a script to update the root store. Use tab to navigate, enter to confirm, and space bar to select. It looks like this:
When the updated zen files are done compiling, replace the zen node files:
zen-cli stop
sudo cp src/zend /usr/bin/
sudo cp src/zen-cli /usr/bin
zend
test the installation:
zen-cli getnetworkinfo
test by connecting from another server:
mainnet:
openssl s_client -connect znode.blockoperations.io:9033
testnet:
openssl s_client -connect znode.blockoperations.io:19033

That’s it! You now have a Zen node operating with a valid TLS certificate.
Secure Node Testing on Testnet
If you would like to convert your node to testnet and operate as a Secure Node on testnet, do the following:
Update the firewall to work for testnet:
sudo ufw status
sudo ufw allow 19033/tcp
sudo ufw reload
Set up the secure node tracker. Follow the instructions here: https://github.com/ZencashOfficial/secnodetracker or the Secure Node Tracker instructions on the ZenCash Secure Node Part 3 post
You are going to need some testnet ZenCash. You can earn your own by mining it, or you can ask someone on the slack to send you some. If you mine it yourself, it is tricky to unshield it, so you probably want to go to the ZenCash slack and ask in the #securenodes or #developers channel for about 50 testnet ZenCash.
I find the easiest way to operate it is to install the ZenCash swing wallet on a system, put it in testnet mode, and use the Swing Wallet to manage the testnet ZenCash. Get a transparent address to receive the ZenCash with, create a second transparent address, and send 42 ZenCash to it.
To put the wallet on your system into testnet mode, stop zend (zen-cli stop), add at the bottom of your zen.conf file the statement, and start zend:
testnet=1
zen.conf file location:
- Windows: %APPDATA%/Zen
- Mac: ~/Library/Application Support/Zen
- Linux: ~/.zen
Putting it in testnet creates a new subdirectory in your zen directory called testnet3, where it creates a testnet wallet.dat file. When you are done using testnet, stop zend, comment out the testnet directive in the zen.conf file, and start it again. It would probably be a good idea to copy the mainnet wallet.dat file to somewhere safe while messing around with the zen configuration files and going in and out of testnet.
When you start the tracker software on the node, it is going to give you a shielded address that you need to send more than 1 testnet ZenCash to. Use the Swing wallet to send some testnet to that address.
Then you are ready to run the tracker app. Do that in a screen session, like so:
screen -S TrackerApp
To get out of the screen, but keep it running, type Ctrl-a then d
To reenter the screen, type screen -r TrackerApp
Check if you are registered here: https://securenodes.zensystem.io/
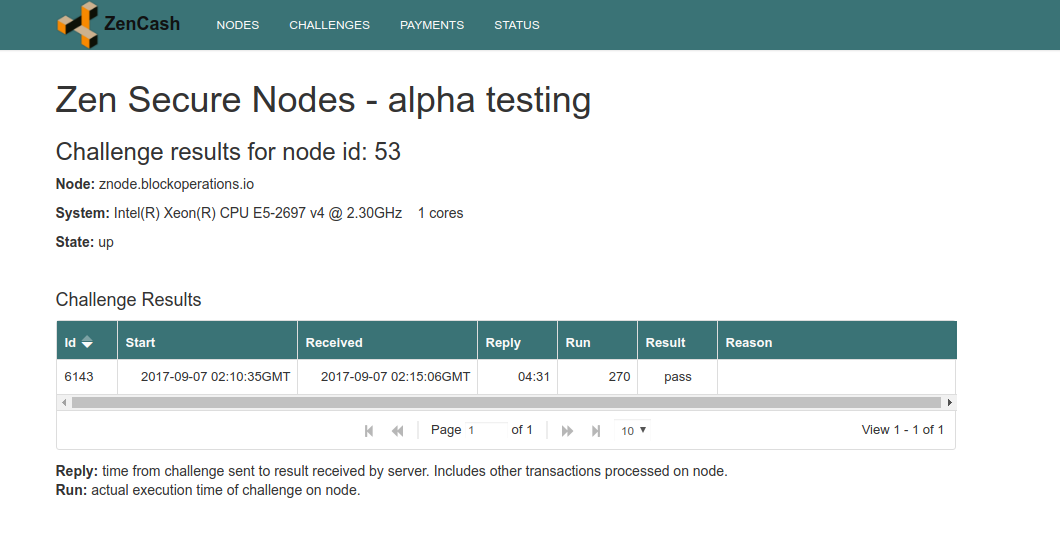
Overall tracker info looks like this:
Tracker info for znode.blockoperations.io looks like this:


Build a ZenCash Secure Node Part 2.5 – Test TLS and SecNodeTracker – CoinAffairs
September 6, 2017 @ 10:05 pm
[…] post Build a ZenCash Secure Node Part 2.5 – Test TLS and SecNodeTracker appeared first on Block […]
【マイニング】 testnet3ノード独自のZENパラメータのことであり、現在流通しているZENとの互換性は無い。
September 10, 2017 @ 12:22 pm
[…] 流れにそって組んでたらPart2で記事が終わったかと思いきや2.5が用意されてて ttps://blockoperations.com/build-zencash-secure-node-part-2-5-test-tls-secnodetracker/ […]
【マイニング】1.マスターノード情報サイトに書いてある「42ZENでマスターノードになれる」は嘘。
September 10, 2017 @ 3:04 pm
[…] 流れにそって組んでたらPart2で記事が終わったかと思いきや2.5が用意されてて ttps://blockoperations.com/build-zencash-secure-node-part-2-5-test-tls-secnodetracker/ […]
September 11, 2017 @ 6:20 am
Thanks for an excellent tutorial Rolf. You’ve put a heck of alot of work into this!
Have all running now & about to join the slack channel.
The only part I had trouble with was getting my local swing wallet into testnet mode. In case others run into the same issue, on Windows the configuration file is stored in %appdata%zen/zen.conf . Adding “testnet=1” at the end of the file and restarting the wallet will resync.
September 19, 2017 @ 8:49 am
any hint where to look? After using new tutorial with .acme have this strange behavier in ubuntu.
openssl s_client -connect znode.domain.com:19033
CONNECTED(00000003)
write:errno=0
—
no peer certificate available
—
No client certificate CA names sent
—
SSL handshake has read 0 bytes and written 176 bytes
Verification: OK
—
New, (NONE), Cipher is (NONE)
Secure Renegotiation IS NOT supported
Compression: NONE
Expansion: NONE
No ALPN negotiated
SSL-Session:
Protocol : TLSv1.2
Cipher : 0000
Session-ID:
Session-ID-ctx:
Master-Key:
PSK identity: None
PSK identity hint: None
SRP username: None
Start Time: 1505825167
Timeout : 7200 (sec)
Verify return code: 0 (ok)
Extended master secret: no
Video – ZenCash Software Development and Integrations Update Sept 20 – 2017 – ZenCash Blog
September 25, 2017 @ 10:46 am
[…] Guides for setting up a Secure Node for testing on a VPS using a method that works is available at Setup ZenCash Secure Node for Testing […]
October 20, 2017 @ 8:01 pm
Hello,
I followed all steps, but am getting FALSE on TLS.
~# zen-cli getnetworkinfo
{
“version”: 2001050,
“subversion”: “/zen:2.0.10/”,
“protocolversion”: 170002,
“localservices”: “0000000000000001”,
“timeoffset”: -1,
“connections”: 9,
“tls_cert_verified”: false,
“networks”: [
{
“name”: “ipv4”,
“limited”: false,
“reachable”: true,
“proxy”: “”,
“proxy_randomize_credentials”: false
},
{
“name”: “ipv6”,
“limited”: false,
“reachable”: true,
“proxy”: “”,
“proxy_randomize_credentials”: false
},
{
“name”: “onion”,
“limited”: true,
“reachable”: false,
“proxy”: “”,
“proxy_randomize_credentials”: false
}
],
“relayfee”: 0.00000100,
“localaddresses”: [
{
“address”: “107.170.217.129”,
“port”: 9033,
“score”: 2
},
{
“address”: “2604:a880:1:20::74:1001”,
“port”: 9033,
“score”: 1
}
],
“warnings”: “”
}
What could be wrong?
December 24, 2017 @ 4:20 am
I had the issue in the prior step “So the instruction should be: sudo .acme.sh/acme.sh –issue –standalone -d znode.blockoperations.io –home “/home/blockops/.acme.sh”” – but I think I redid everything to correct. It is still returning “tls_cert_verified”: false though. Any hints to troubleshoot? I think all the certs are setup correct. Does the overall folder structure matter? My blockops and zencash folders are in my root whereas it seems Rolf has his zencash folder in the blockops folder.
blockops@znode:~/zencash/zen$ zen-cli getnetworkinfo{
“version”: 2001051,
“subversion”: “/zen:2.0.10-1/”,
“protocolversion”: 170002,
“localservices”: “0000000000000001”,
“timeoffset”: 0,
“connections”: 0,
“tls_cert_verified”: false,